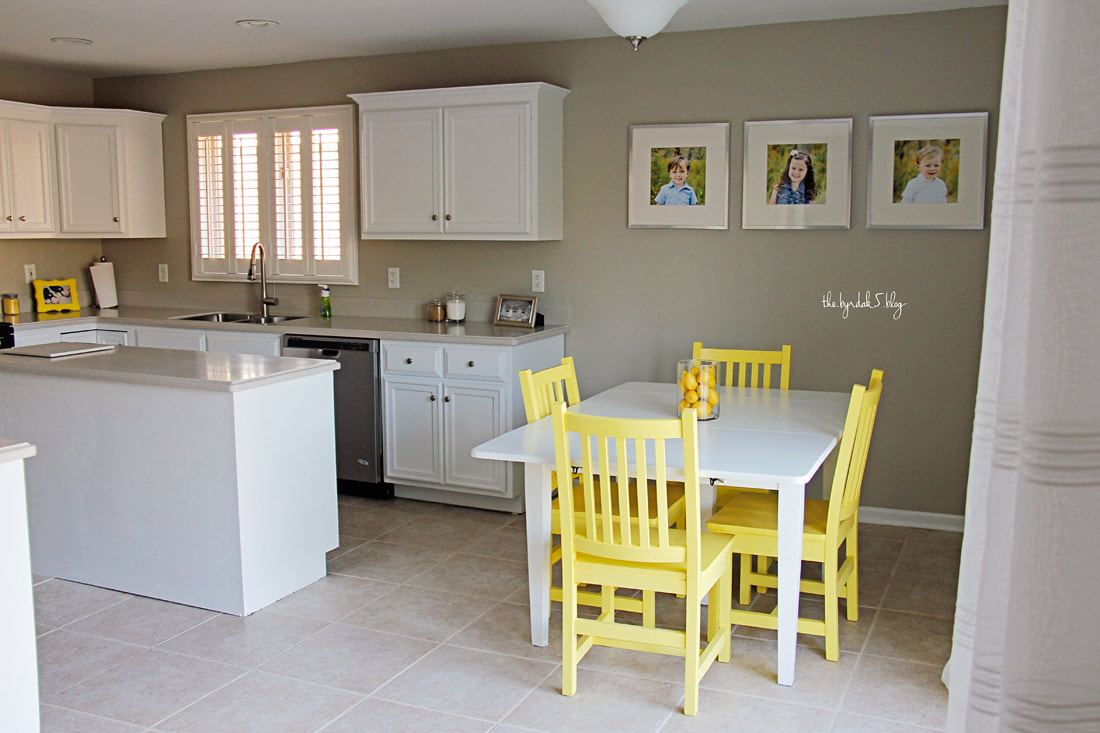
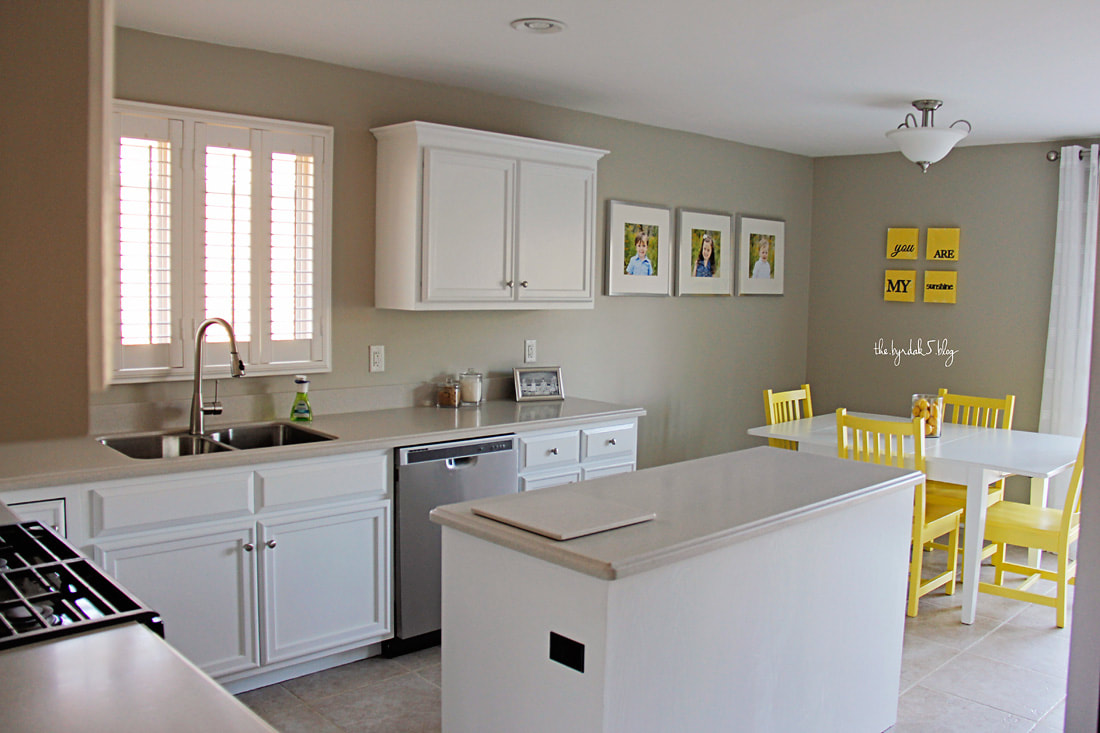
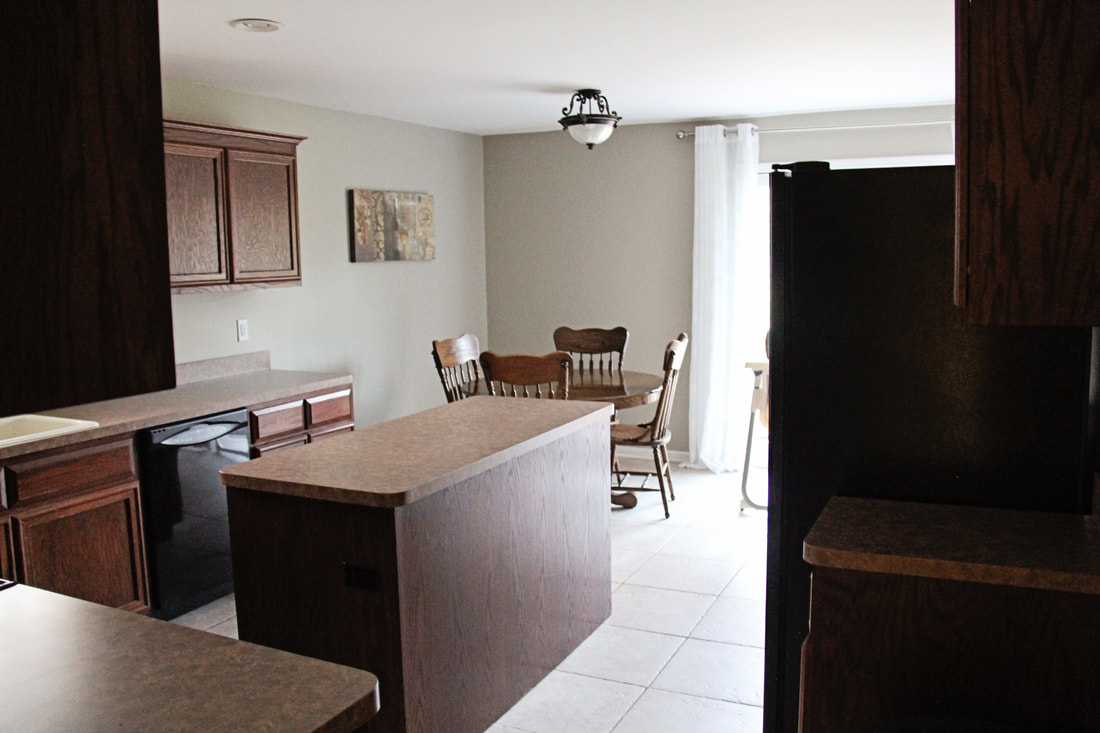
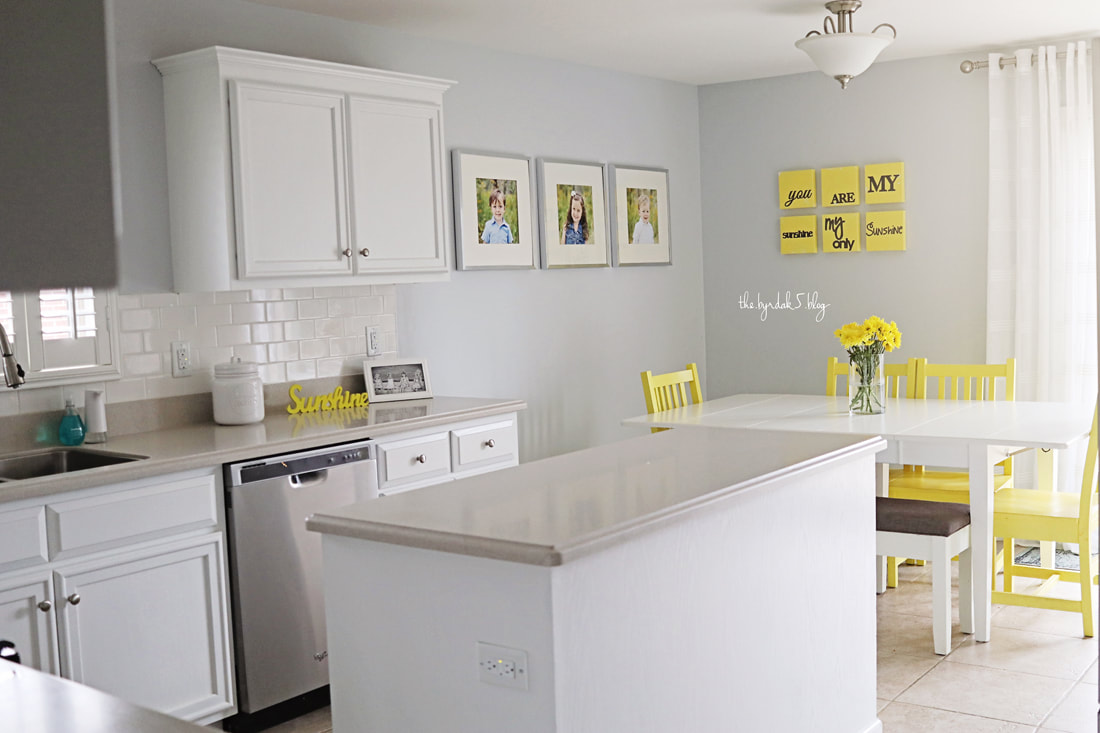
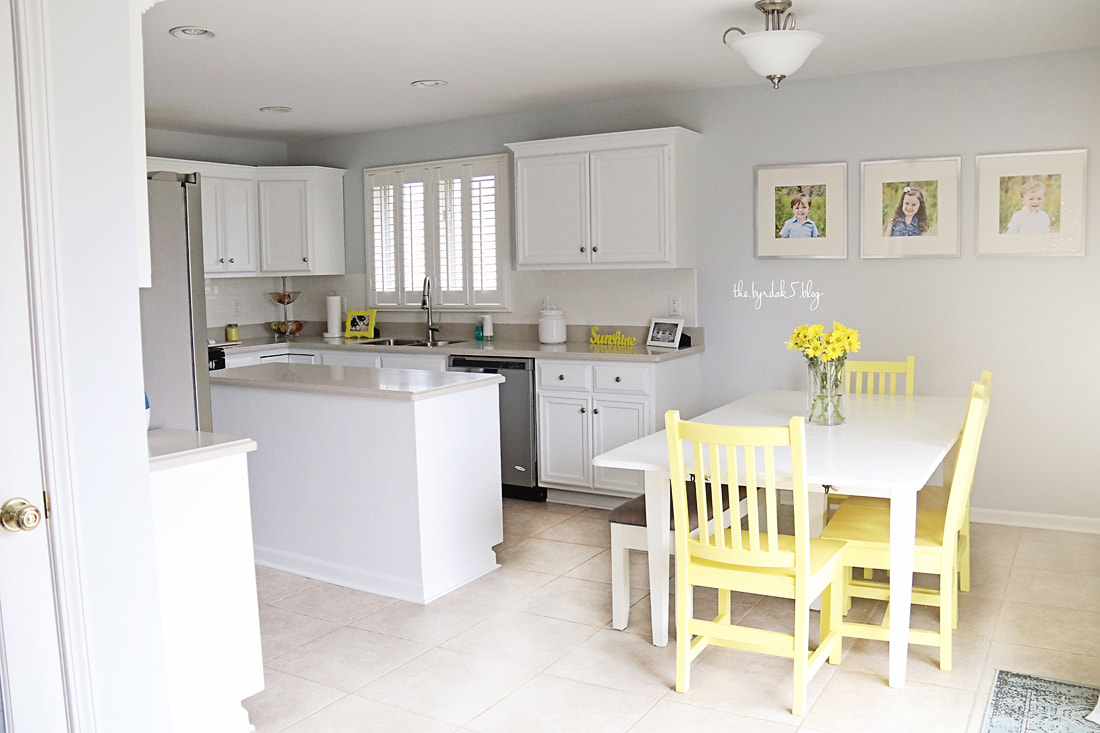
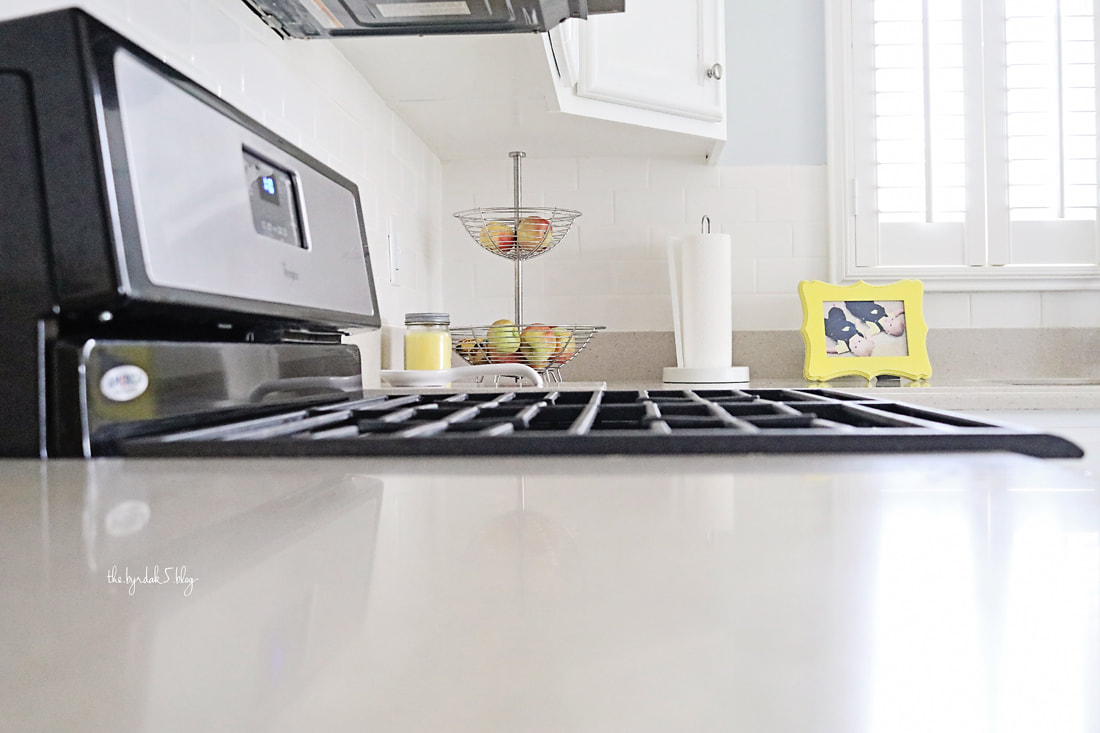
      This month - 11.11.13 to be exact is our house anniversary - as we celebrate 4 years of living here filled with so many memories, happy to say we finally have a completed kitchen! Our original hope was a total rehab, but given the kids were so young 2 years ago, we decided a mini-upgrade would fit us much better. Holding off on the nice new cabinets and flooring, we opted to paint our existing ones, new counter top, and stainless steel appliances. While I loved our bright space, there were a few small projects in our future....and with the help of my handy brother in law and my husband (if you can believe) we added a fresh new coat of paint, trim around the base of the cabinets and island - and finally a backsplash which is my absolute favorite part! We are now the proud owners of a wet saw if anyone ever needs to borrow! It's so crazy to think that our kitchen looked so different when we moved it, we seriously can't believe it! Excited to keep it moving, because you are never really done, right? 1 down 100 to go! Round one complete November 2015
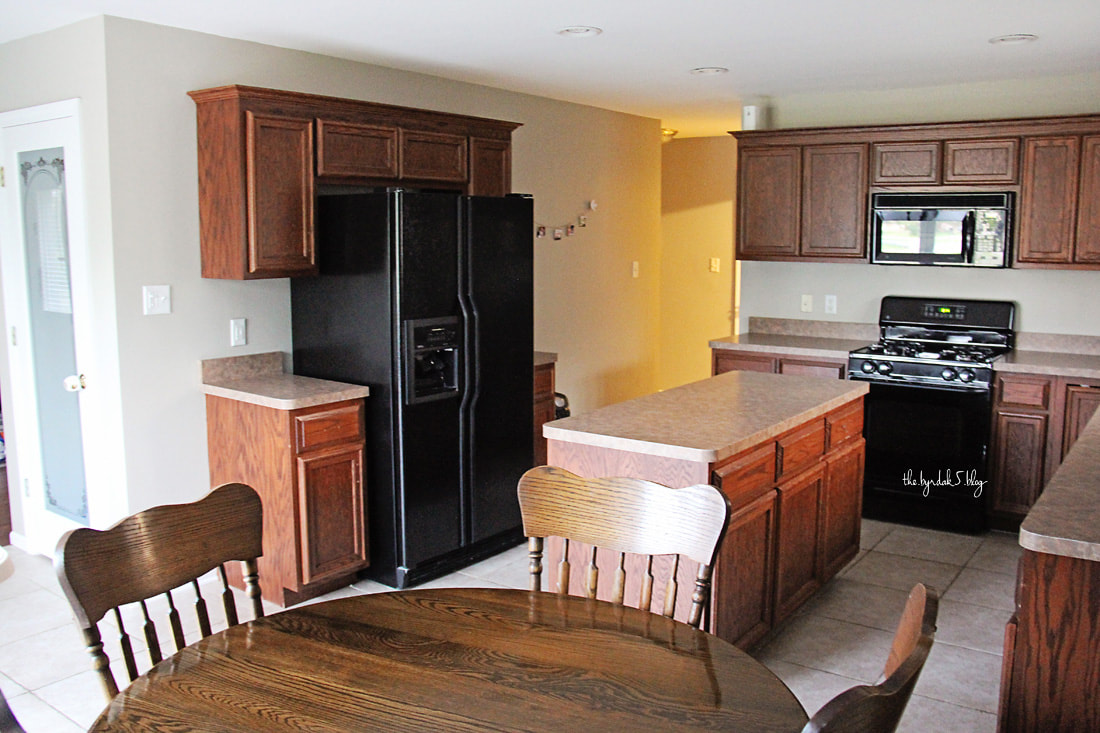
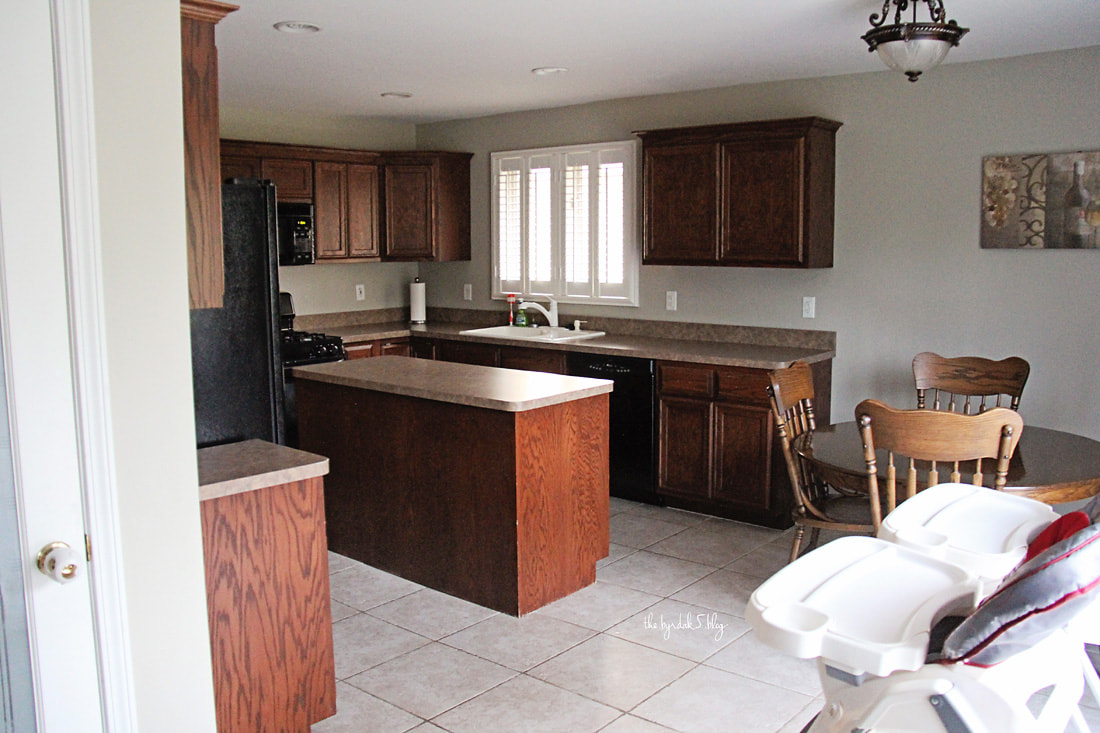
Original kitchen November 2013
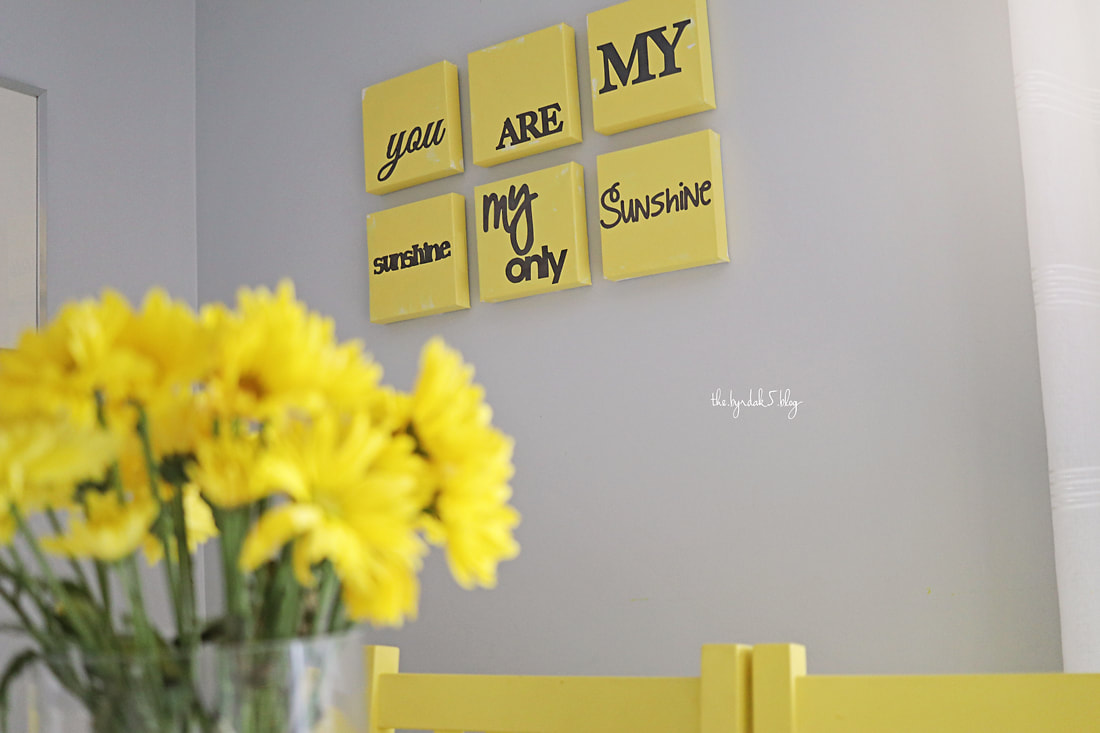
Painter: Don Zerkel Decoration 815.263.5393 Countertops: Kraft Custom Design 815.485.5506 Appliances, sink and light fixture: Lowes Table and Chair refinishing (light maple to white and yellow): Penelope Pumpernickel Reclaimed Holiday lunching with my team at work this week talking about holiday cards and if/when they will start send them out {as most are less than a few years out of college}. Funny, for me it has been so long I completely forgot what prompted me to begin mailing them out. As I was hanging up cards today and going through a box of ones I saved, I found all of our past cards! Each one has a story, and it all started back in 2007 when Scott and I were engaged! Not much has changed as all but one card is either us photographing our kids or using a self timer (even back in 2007)! 2007 {our first stab at a self camera timer on our little canon rebel as well as my first try at a circle cutter}  2008 { given our wedding was just 1 month prior to Christmas send a thank you and holiday wish together }  2010 { skipped 2009, but came back with a sweet picture of Kyleigh at just 3 months old } 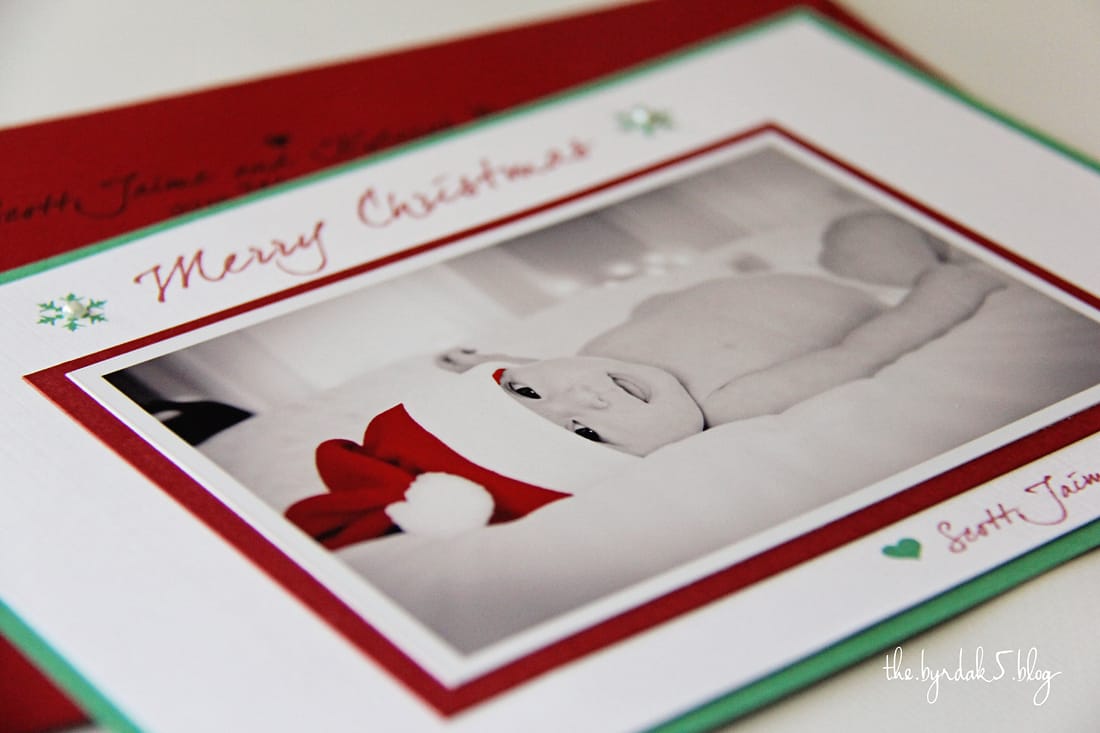 2011 { this is the year my love for snow pictures began, every year I hope for a snow early enough for our holiday card, but it has not happened since } 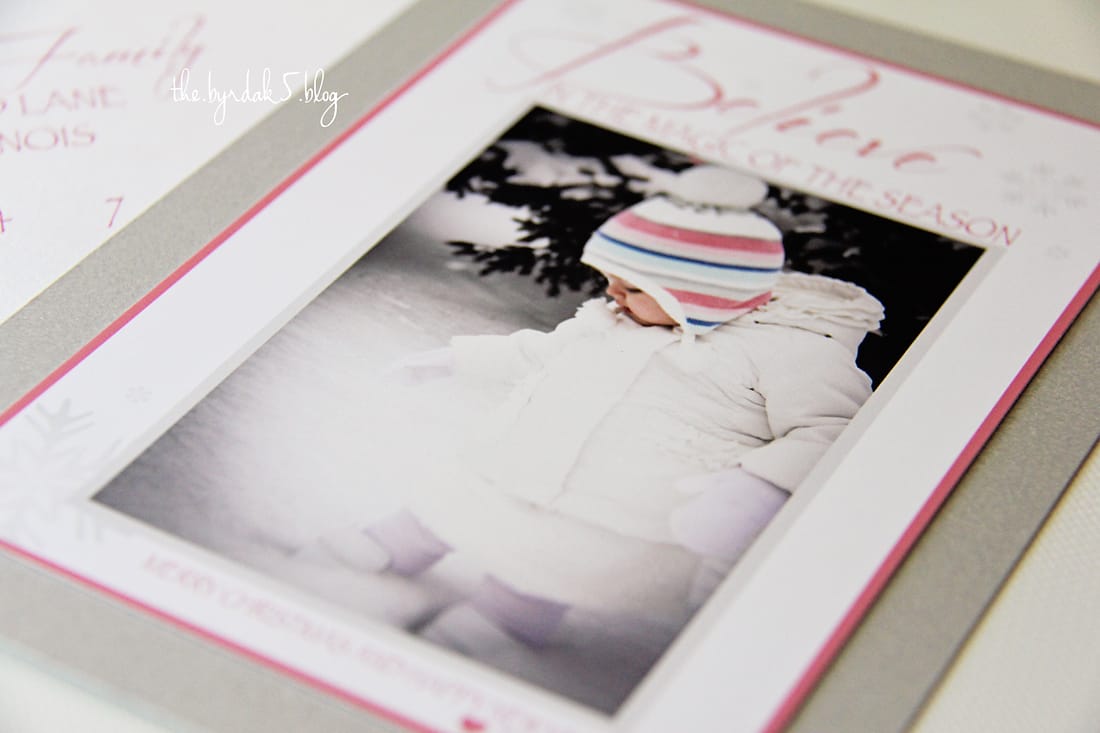 2012 { two memories from this card, it is the only one we didn't do our own pictures but used a photographer, and secondly it is also the same day I went to the doctor hours before and found out we were having twins! } 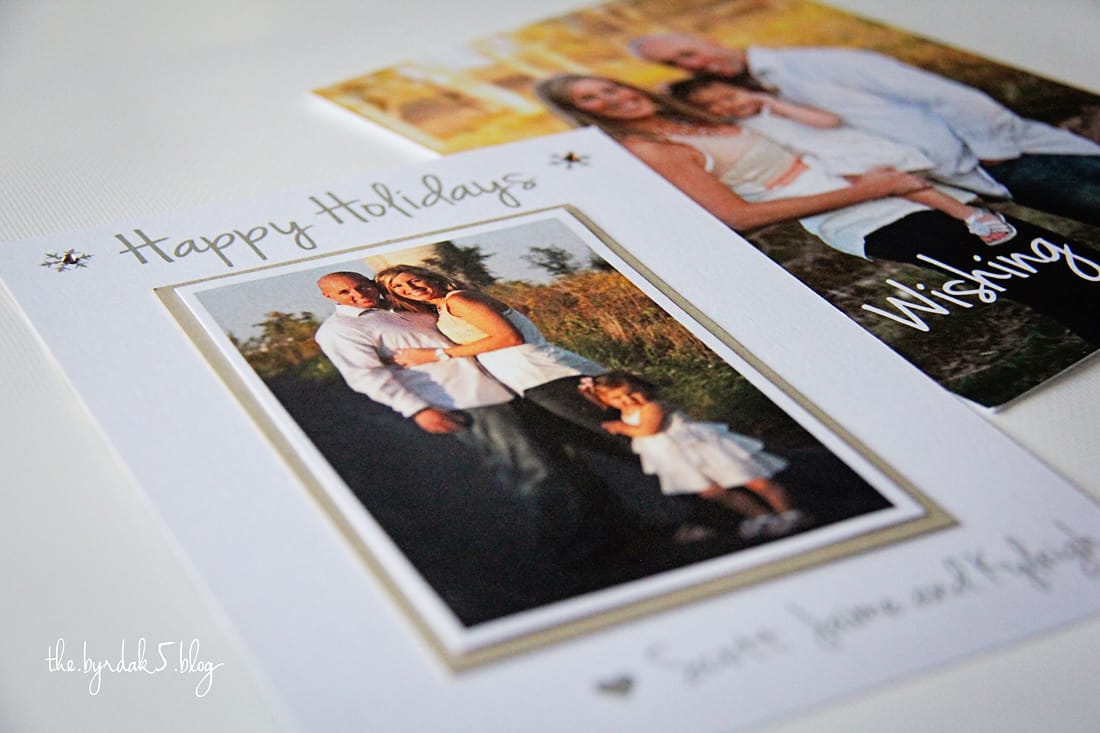 2013 { the boys card debut they were 7 months old and looking adorable in their PJs, this was also the first Christmas in our new home } 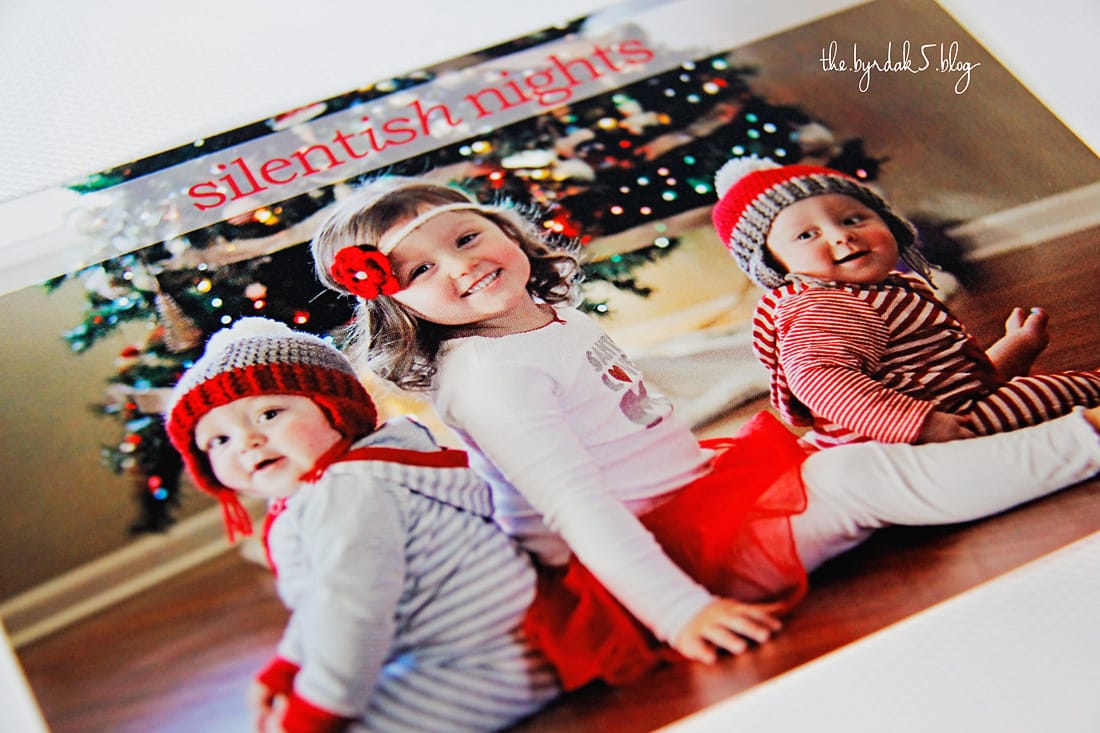 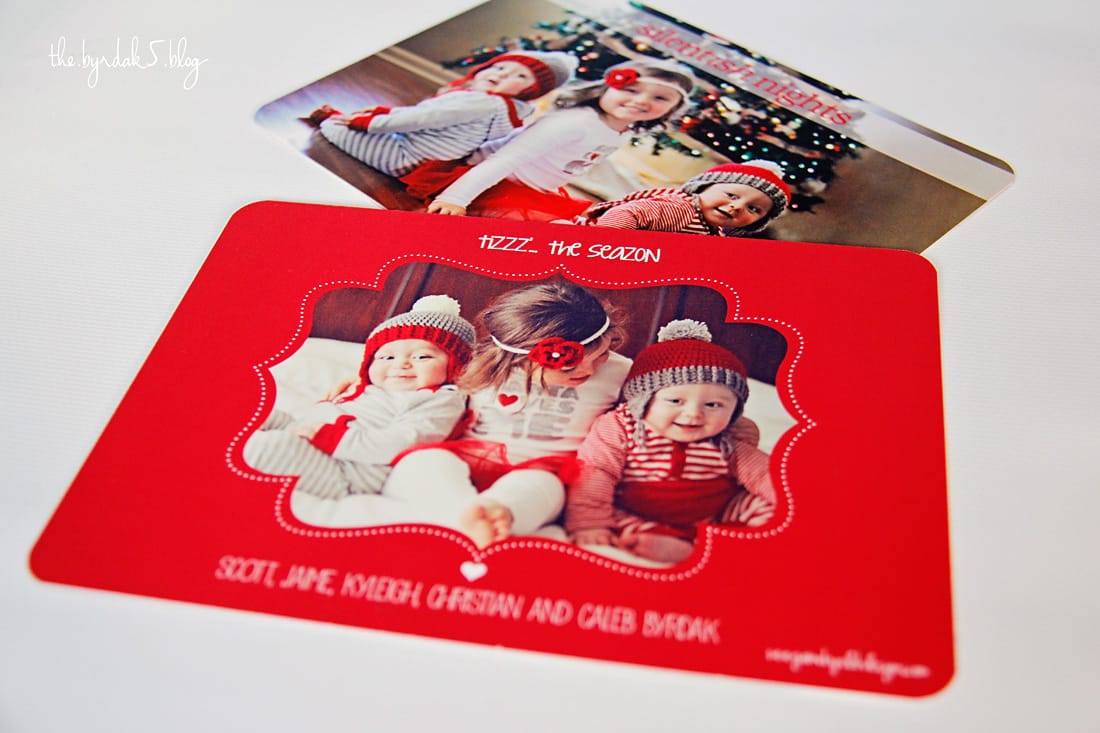 2014 { our first trip to the Chicago Beaches and definitley not our last, I also think it was the boys first time in the sand, they loved it } 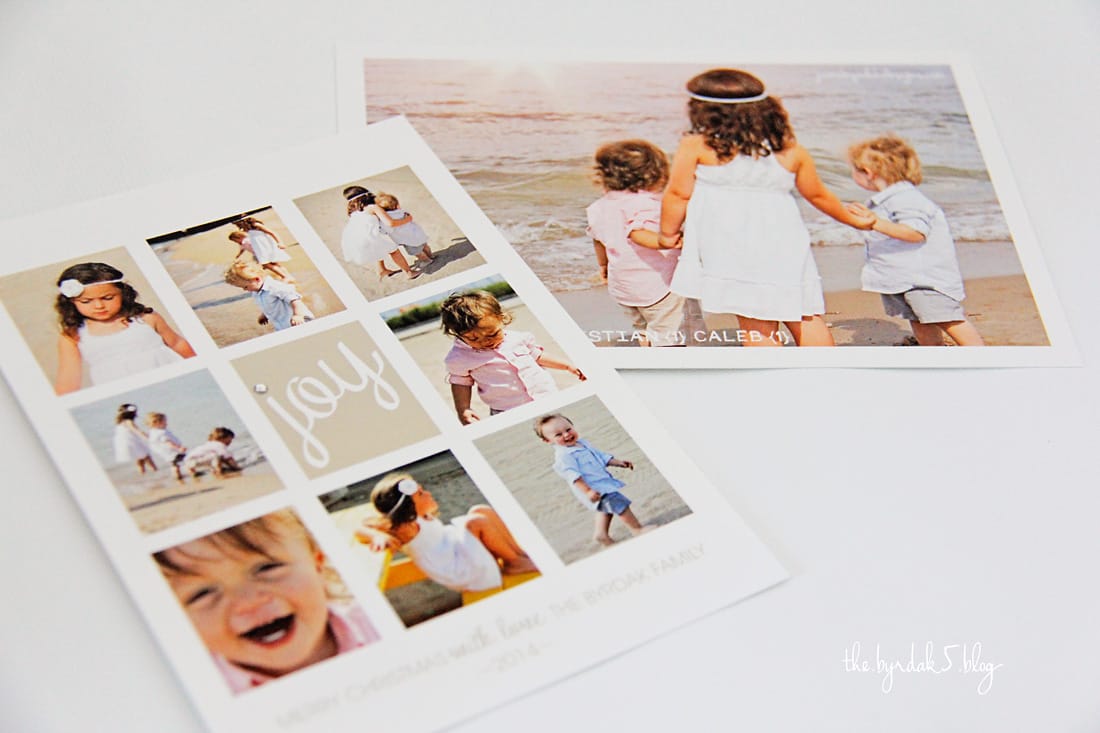 2015 { another self timer picture with our matching pjs .....we sure were laughing and the outtakes were the best! } 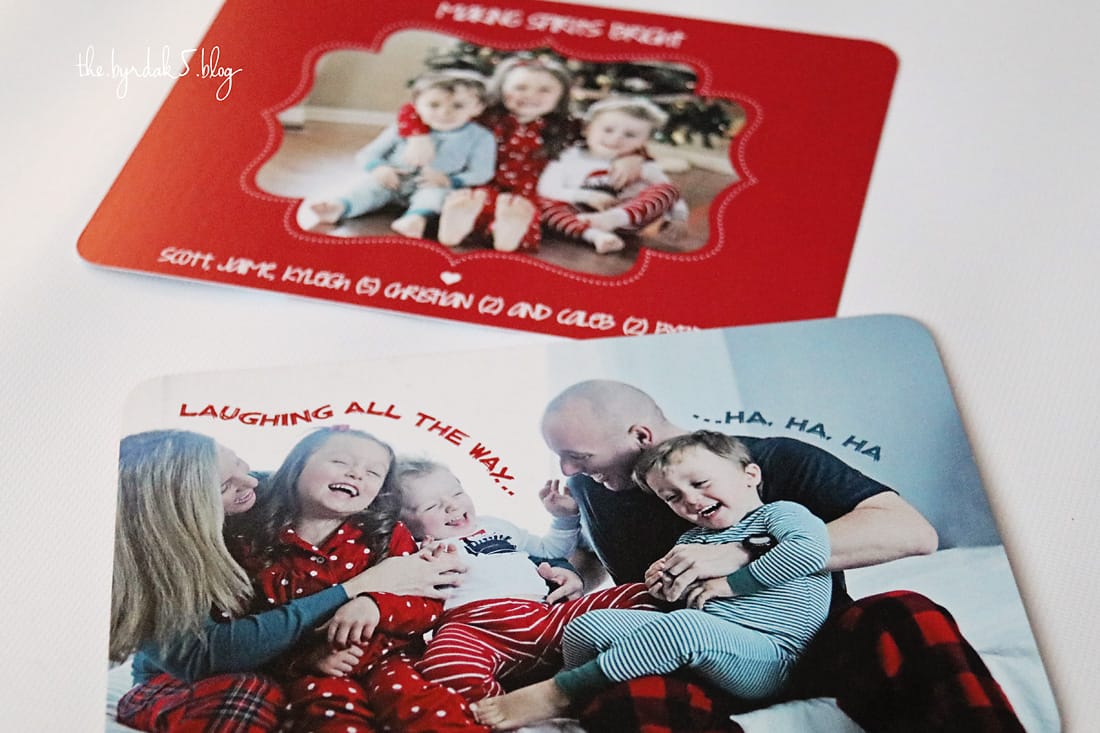 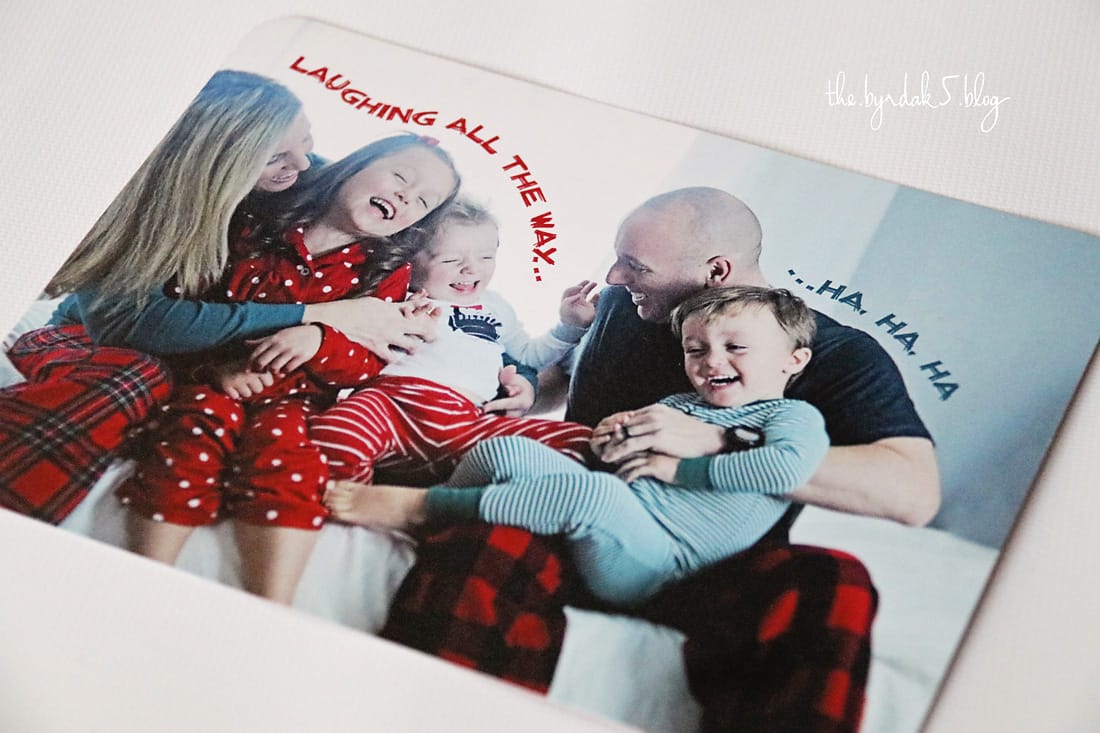 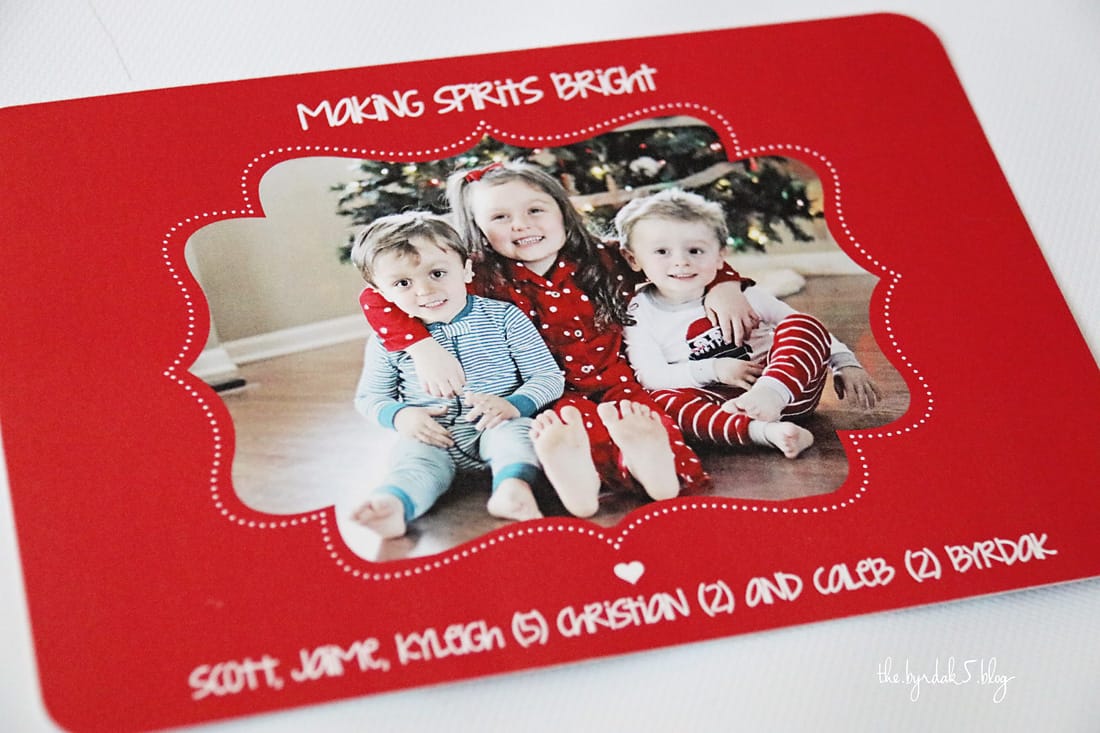 2016 coming soon!
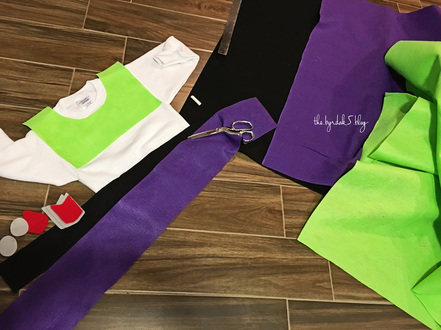
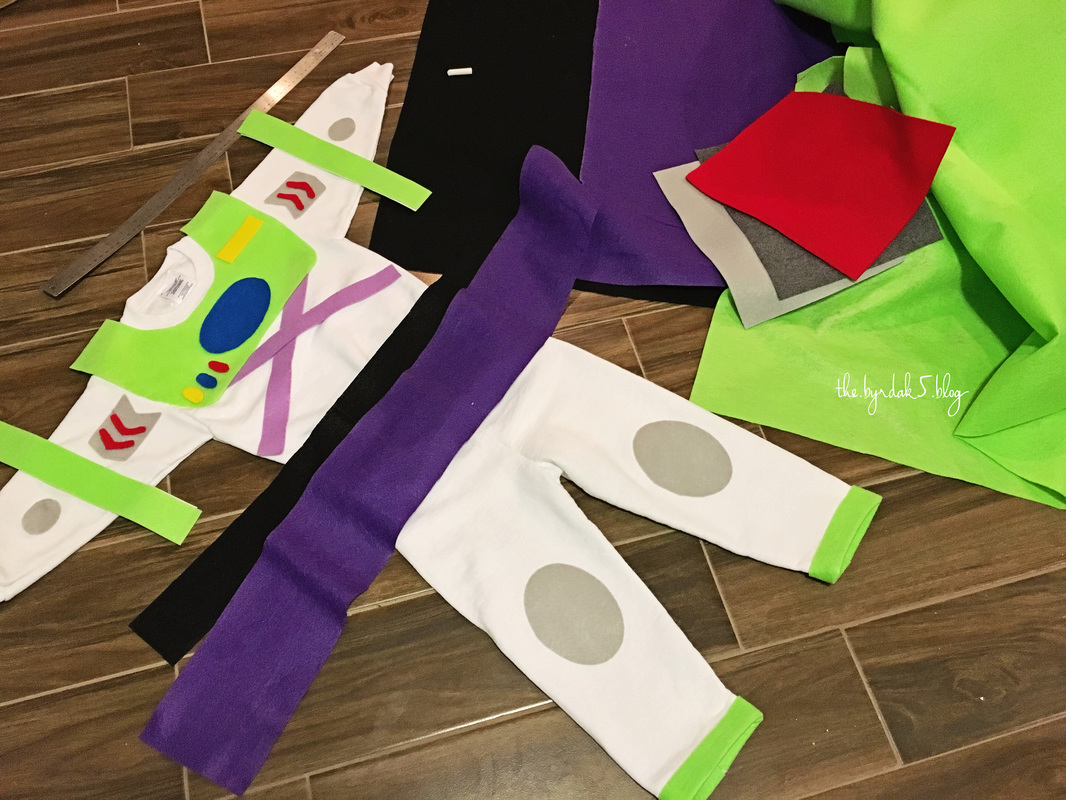
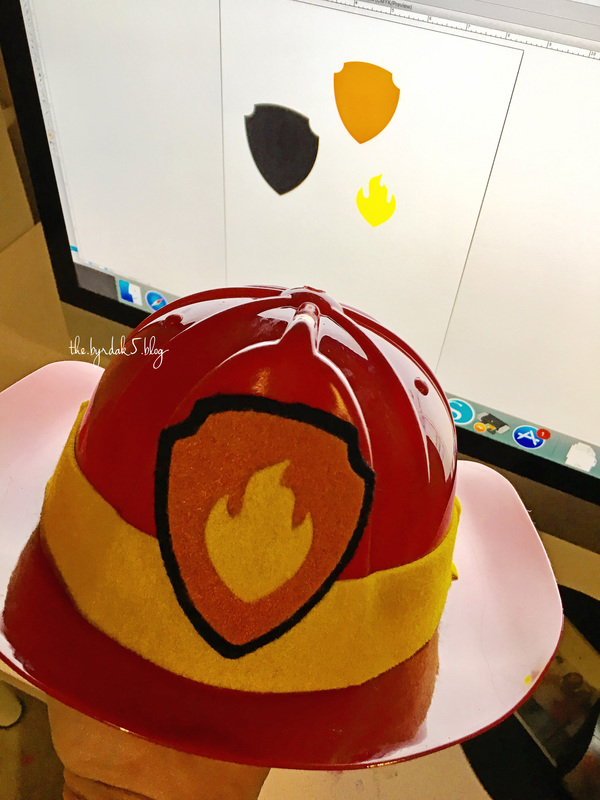
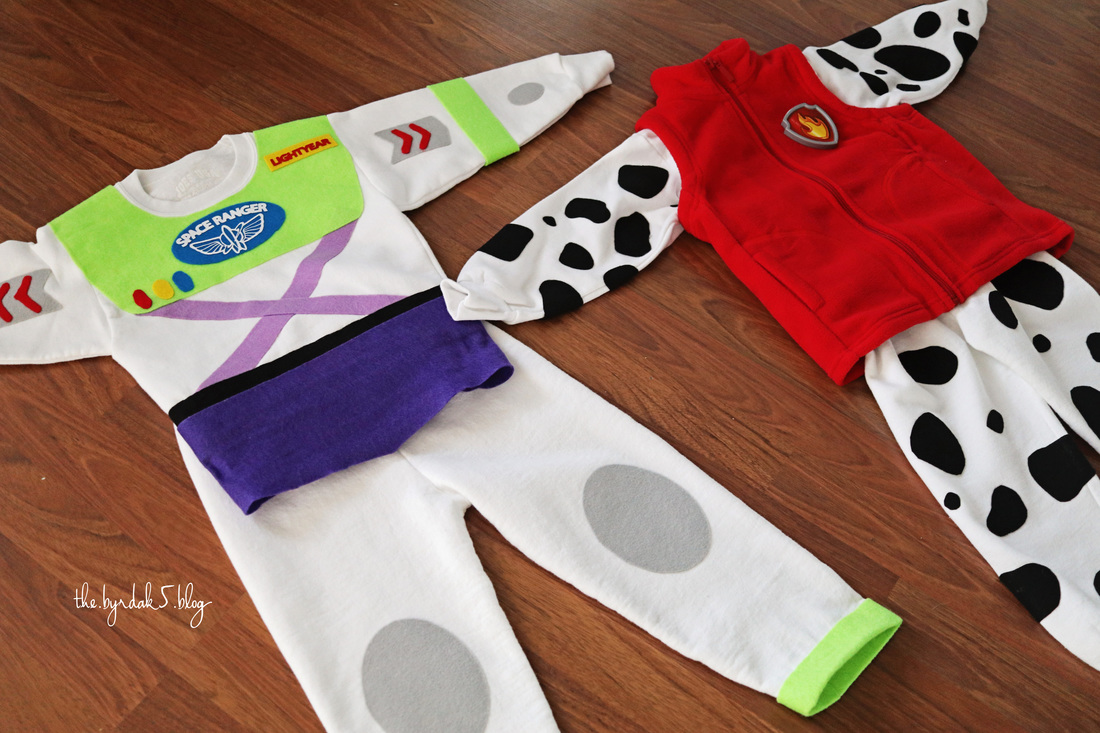
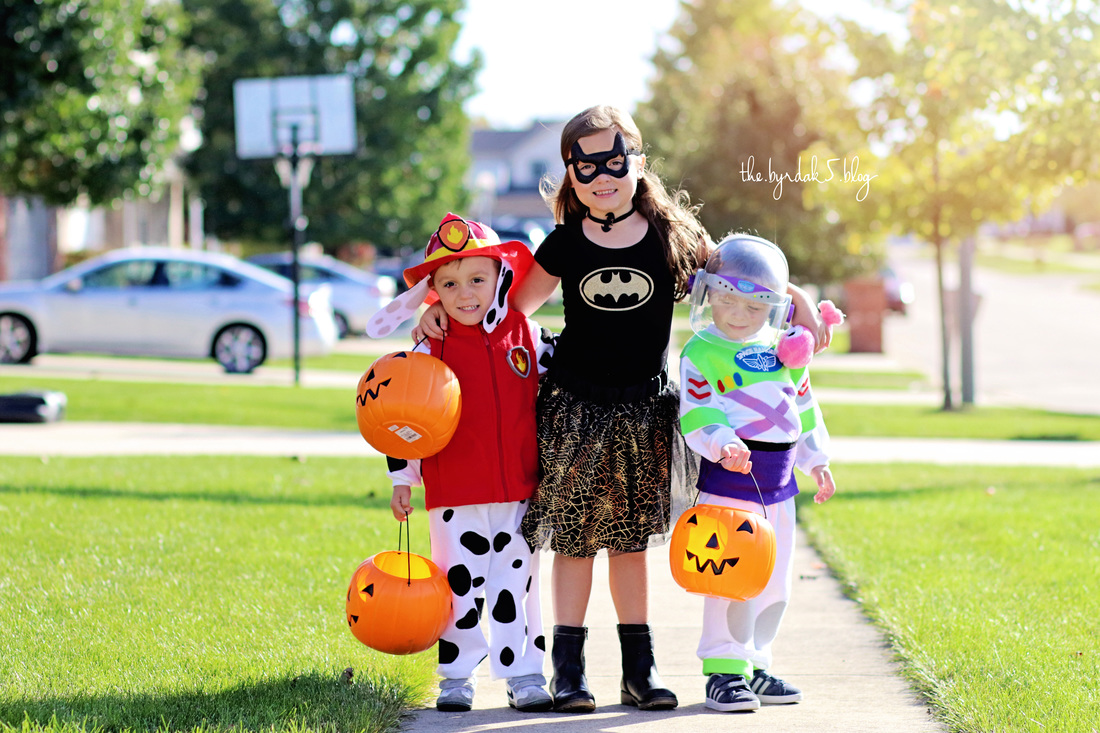 The Halloween magic is strong in our house this week....the kids get so excited to dress up as their favorite characters and enjoy seeing all of the other costumes during the festivities. While I wish I could still coordinate outfits, I do love how they all have such unique interests and each picked one that reflects their personality perfectly. We started the boys outfit with a white sweatshirt and sweatpants, after a trip to Joanne's with several yards of colorful felt, it was cutting and heat bonding time to bring Marshall from Paw Patrol and Buzz Lightyear to life. Kyleigh was originally planning a chocolate chip cookie shopkin, but a last minute switch to batgirl turned out to be a really cute outfit that we created out of a black leotard. With halloween in 1 day, we have been so lucky to already get good use out of the costumes between dance and school parties. The real fun is the trick-or-treating part and can't wait for some beautiful weather this year! 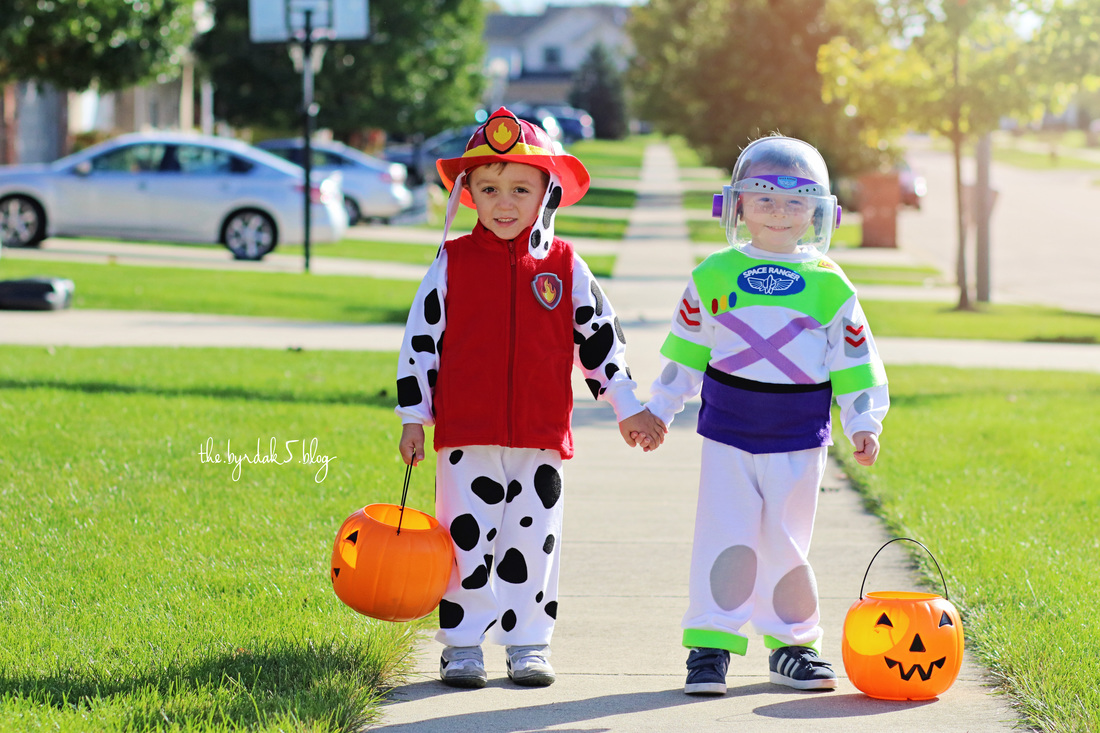 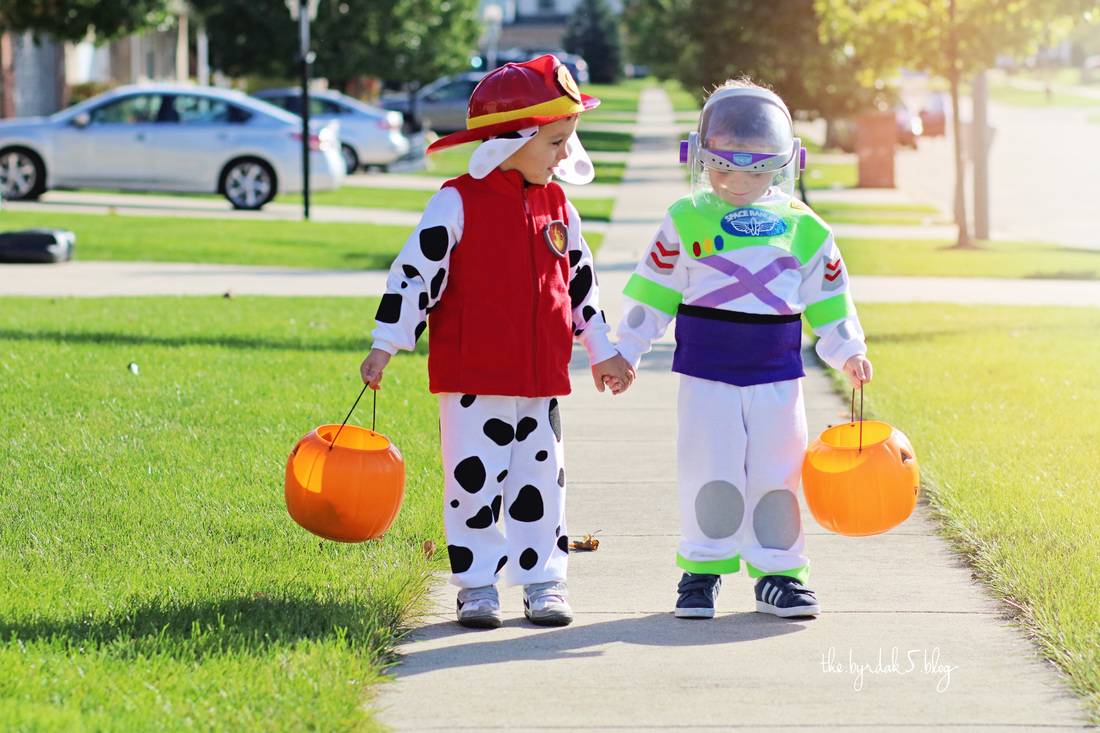 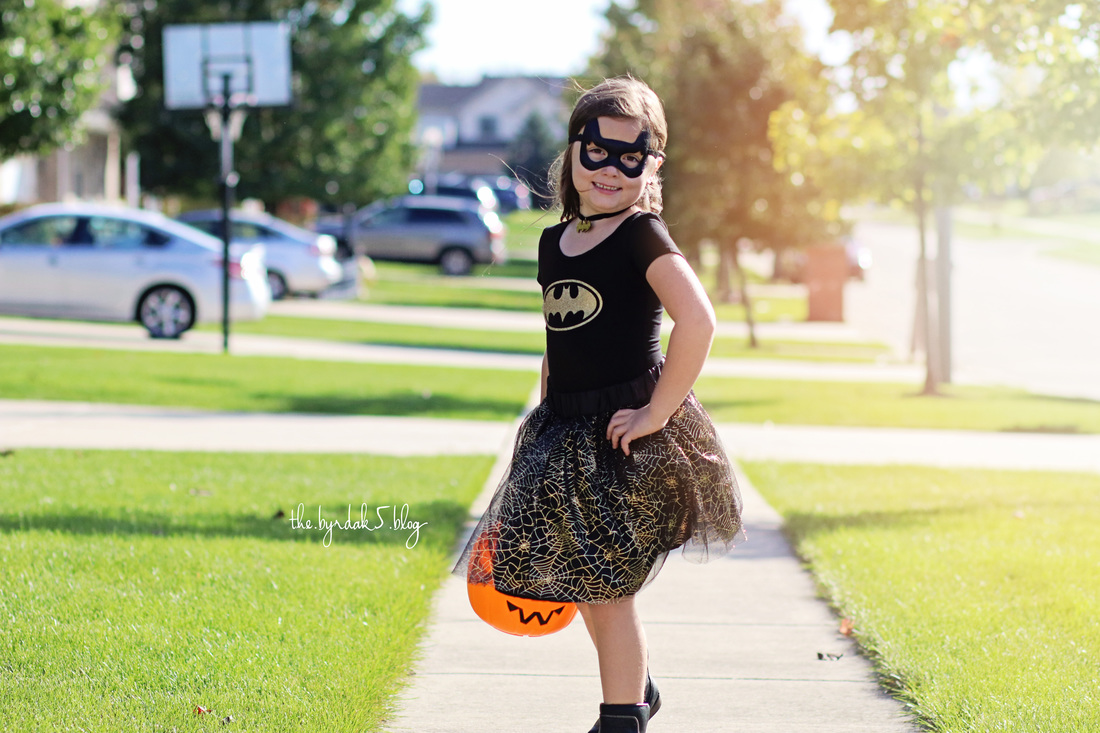 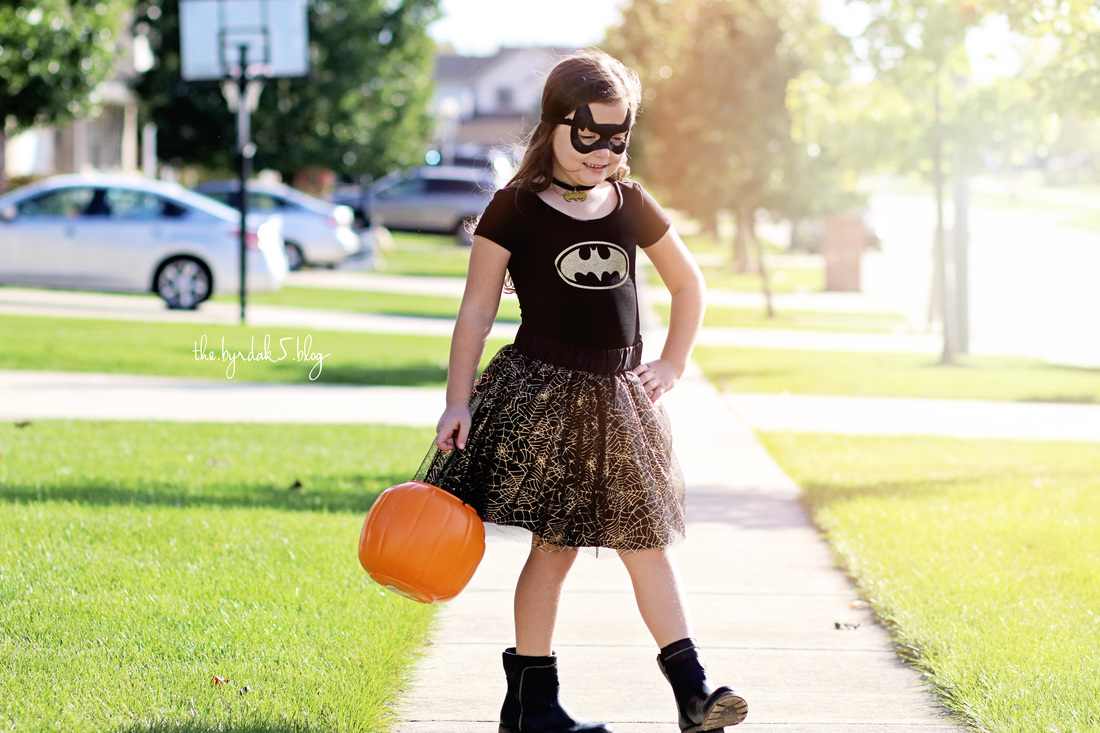  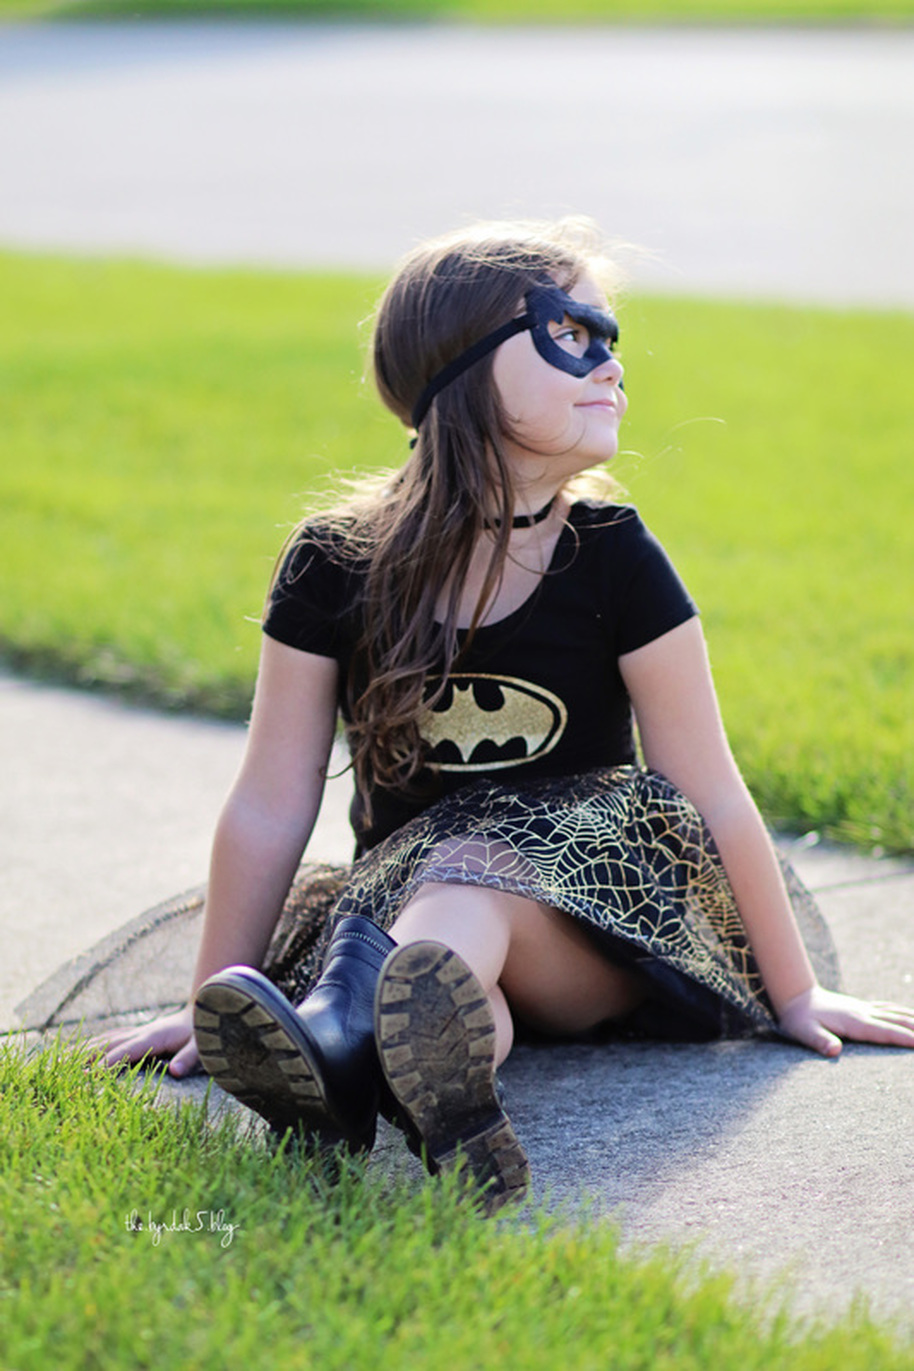 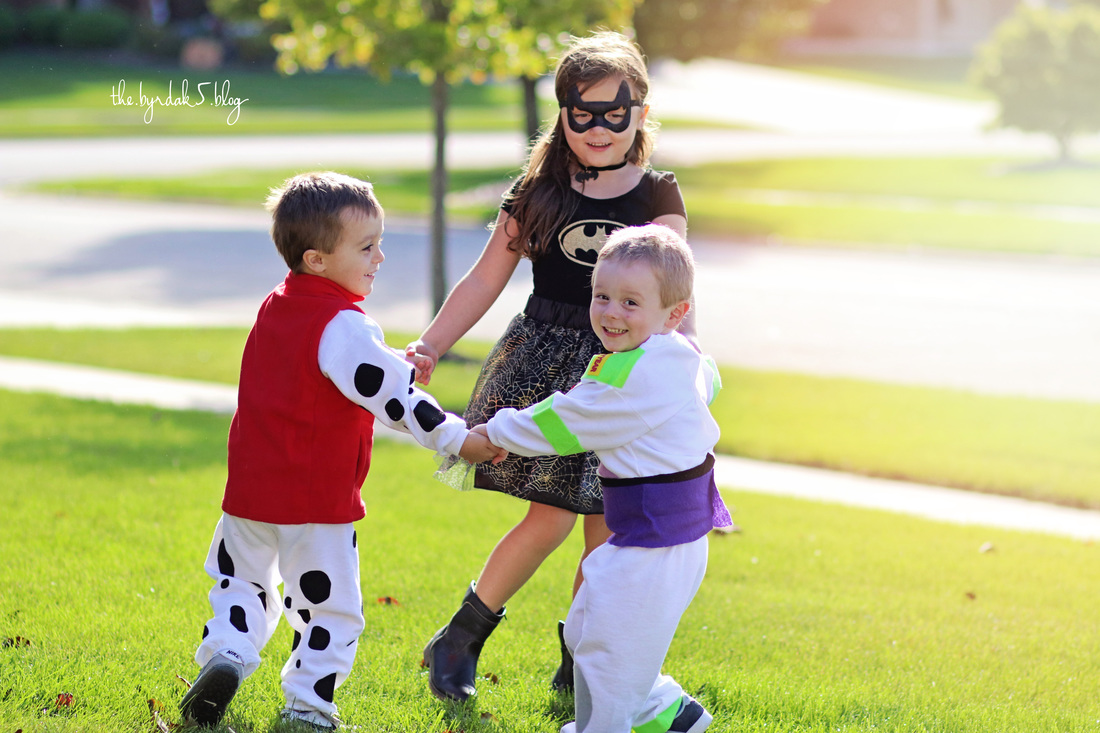 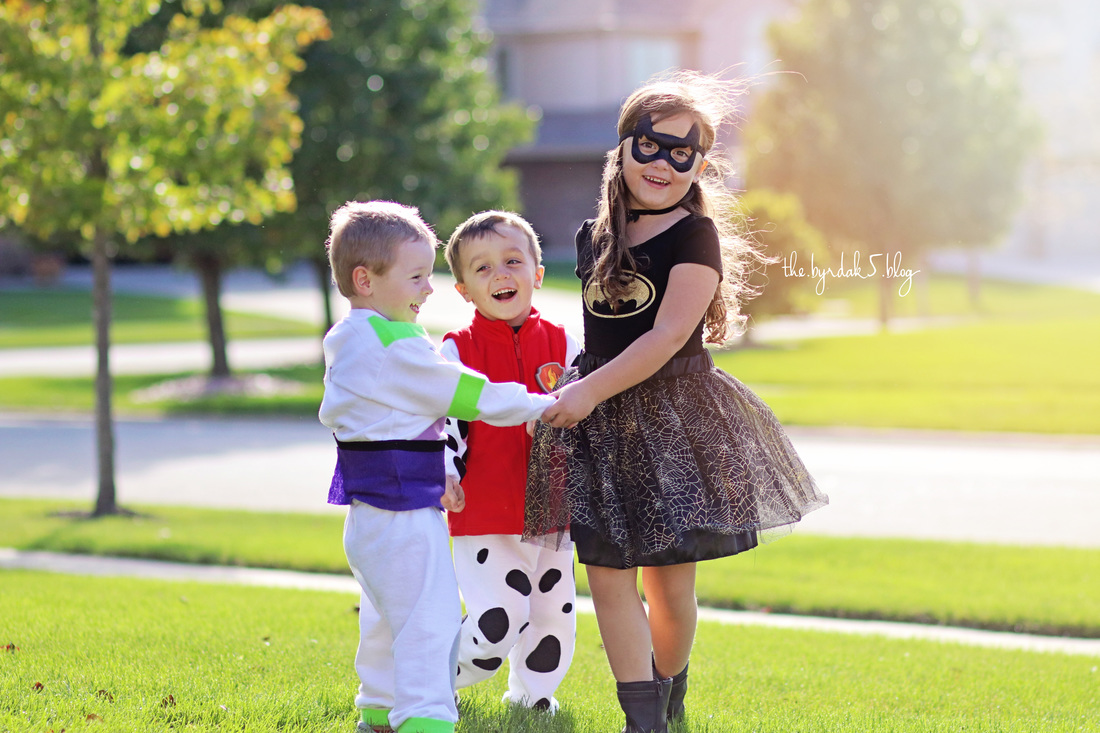 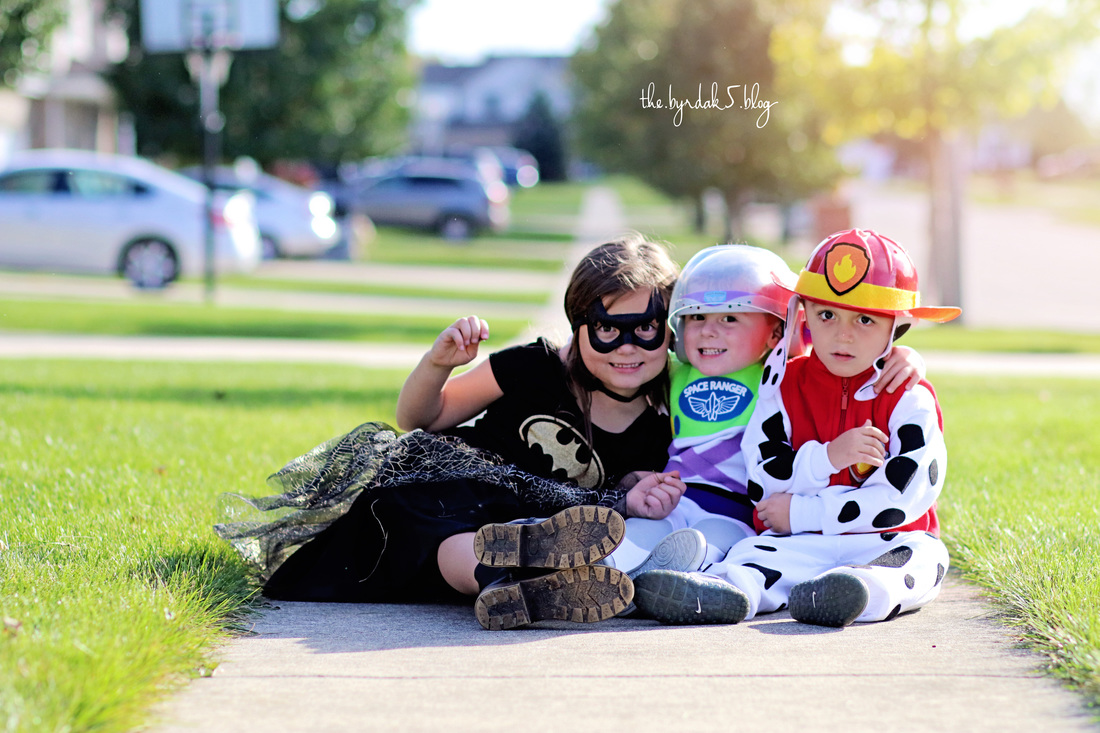 While I usually have every intention of creating a tutorial on my progress, I typically keep cranking along that I forget to take a step back to photograph. This time, I did take a few, doesn't give the entire process, but a quick sneak into some of the details. This is the first time I have used my silhouette for anything other than paper and I absolutely loved it! Also, would love to learn how to sew one of these days, but the heat bond I used was amazing, so glad I did not even attempt a glue gun. All in all the kids are in LOVE with the costumes and so am I.....Happy Halloween everyone!!!
I'm going to try something new this post....a behind the scenes editing before and after! Something great to keep in mind if you have a cute prop or clothing that doesn't exactly match the look and feel you are going for, there is a way to tweak the color in photoshop to make it look more consistent.
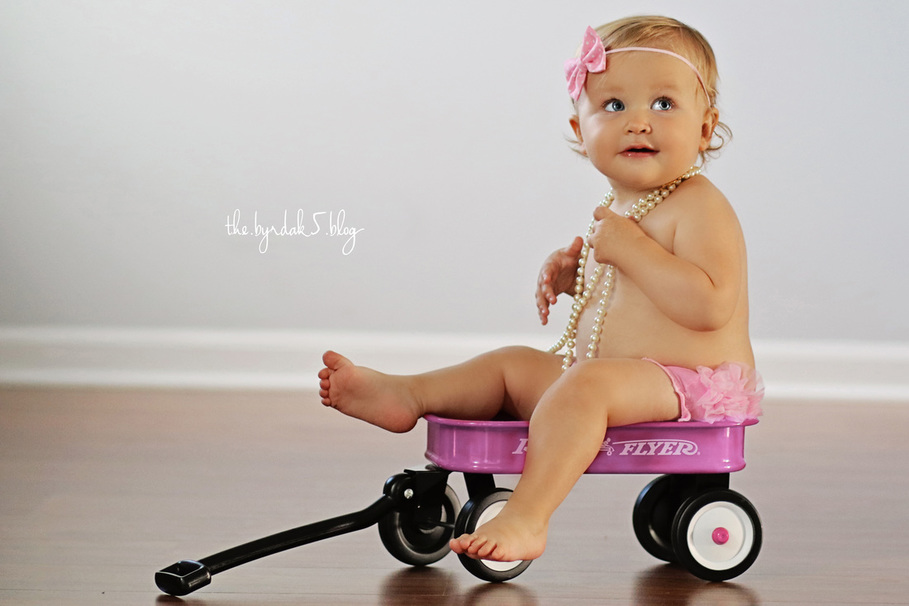
In one of the examples below, for a 1st birthday shoot Hadley's mommy and daddy brought an adorable red wagon. To help match the cute light pink bow and bloomers I adjusted the wagon to match the color scheme....you don't realize what a difference it makes until you do a side by side set up. 
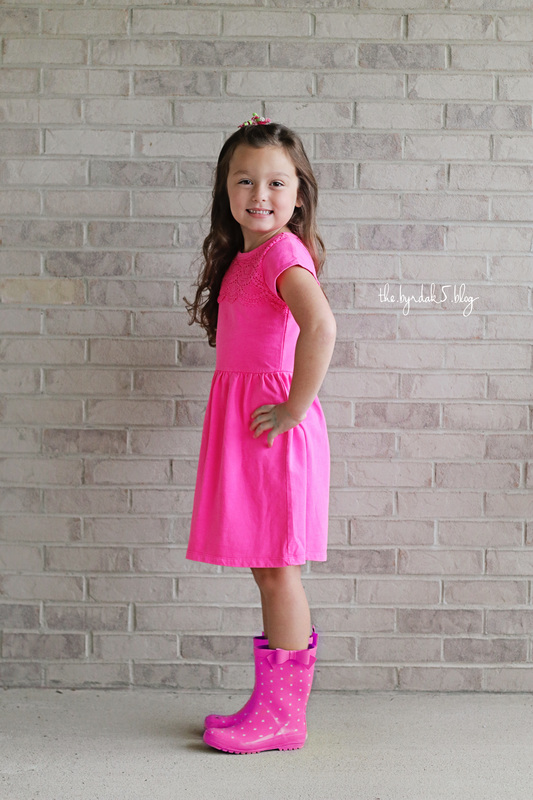
Another example is from yesterday right before picture day.....the yellow boots were not part of the plan, but with the rain pouring down we had no choice. For fun, we turned them pink to match the dress and love the final output!
Some colors are too light or too dark to adjust and not look funny, but it's great for bright accents. Looking forward to the upcoming photoshoots I have this weekend and keep this in mind as you are planning out your color scheme!
|